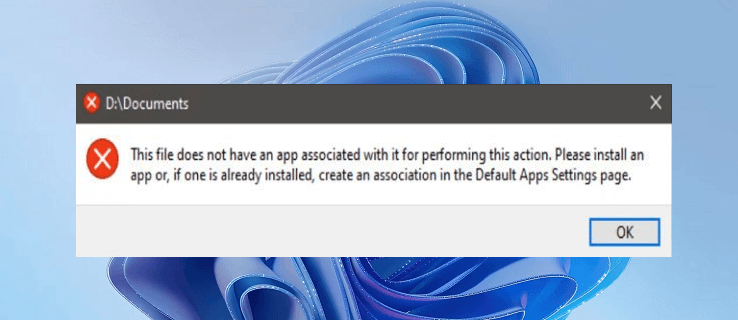
If you’re using a Windows computer, you perhaps experience a strange error message while trying to open a file or third-party program. “This file does not have an app associated with it” is the error meaning there’s no application to open this file on the computer. Unfortunately, restarting the device cannot solve it. If you’re facing the same problem, here find the troubleshooting methods to fix it.
Fixes for This File Does Not Have an App Associated with It for Performing This Action
1. Open the File using File Explorer
If Windows OS displays “This file does not have an app associated with it”, try to open that file using File Explorer. Several users claimed to see the error message while trying to open files using the timeline tool or search bar. Thankfully, File Explorer can be able to fix the problem.
2. Perform SFC and DISM Scan
If the system files get corrupted, you probably fail to access Settings on Windows 10 or 11 and receive the error. But you can repair the corrupted system files using Windows in-built repairing tools.

The System File Checker (SFC) tool scans the complete system and repairs corrupted files. Another scanning tool is Deployment Image Servicing and Management (DISM), which repairs Windows corrupted images.
To run SFC and DISM, follow these steps:
1. Type cmd in the Windows search box and open Command Prompt as an administrator.
2. Type the command sfc /scannow and hit enter.

3. The SFC tool will start scanning the system files and repair them if needed. Don’t close the system until the scan completes. Afterward, check whether the error still persists. If yes, run DISM next.
4. Again open Command Prompt as an administrator.
5. Type DIM /Online /Cleanup-Image /RestoreHealth and hit enter.
After the scan, you will not see the error.
3. Change the Default App
If Windows is unable to open the file and the app required to open it is on your computer, change the default app to access the file. You can do it using the “Open with” option.
For that, open File Explorer, find the file, right-click on it and select Open With from the menu. Choose one of the recommended apps to open the file or click “Choose another app” if the app you’re searching for is not in the recommendation.
4. Download Correct File Opener App
When you try to open a file on Windows, the operating system evaluates that file’s extension automatically. The file extension is the suffix at the end of a computer file followed by a dot. It has three or more characters showing the format of the file.
So, check for the file extension you want to open and find the correct file opener app for that format. Download that app and install it on your computer to open that problematic file. For example, if the file extension is in .jpg format, use Google Photos to open that image file.
But remember, you should download the apps from their official sites or Microsoft Store to avoid any harm to the system.
5. Re-register Windows Default Apps
Often, Windows apps fail to start or crash suddenly. In that case, you can re-register Windows default Microsoft Store apps for fixing the issue. Since you’re unable to access Windows Settings, the fastest way to re-register is via PowerShell.
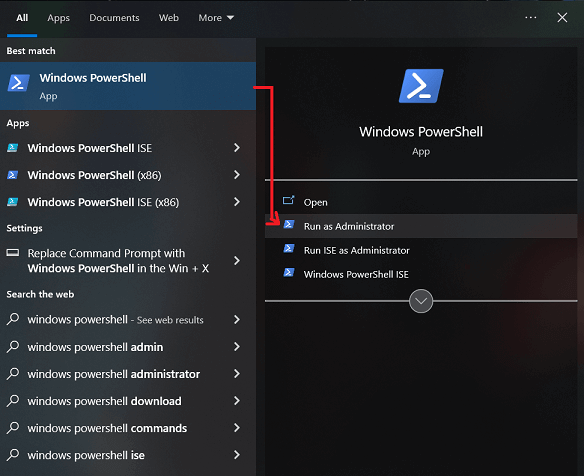
1. Type windows powershell in the search box and right-click on Windows PowerShell from the menu and select Run as administrator.

2. On the PowerShell screen, enter the following command:
Get-AppXPackage -AllUsers |Where-Object {$_.InstallLocation -like “*SystemApps*”} | Foreach {Add-AppxPackage -DisableDevelopmentMode -Register “$($_.InstallLocation)AppXManifest.xml”}.

3. Reboot the machine.
This will repair and re-register your Microsoft Store apps when they stop working.
6. Turn Off AutoPlay
If you see the error “This file does not have an app associated with it for Performing This Action”, it might be due to the AutoPlay feature. To fix the error, you can turn off AutoPlay for all devices.
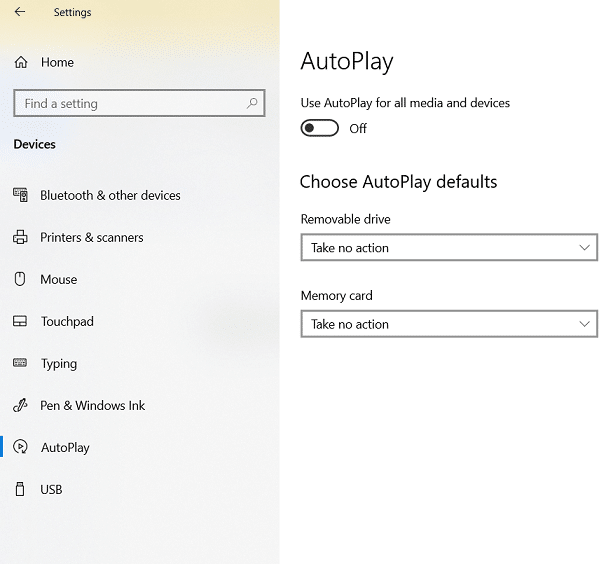
- Select the Start menu and click Settings > Devices.
- Select the AutoPlay tab from the left menu and ensure to toggle off the Use AutoPlay for all media and devices. Also, verify the Removable drive and Memory card options are set to Take no action.

7. Run Windows File and Folder Troubleshooter
For repairing corrupted or damaged files and folders on Windows 10, Microsoft has introduced a special troubleshooter called “Windows File and Folder Troubleshooter”. It can automatically analyze and repair issues with files. To get the troubleshooter and start the processing, visit the Microsoft Support page. Run the tool and check your problem has been resolved.
Hopefully, this troubleshooting guide has been useful to solve the “this file does not have an app associated with it” error. Apply them as mentioned above and you can access the file in no time.